Circles seem to be all the rage now, right? Think back to the early days of Facebook, with your profile picture stuck inside a standard square. Today’s Facebook profile pic? Circle.
It’s just one example of many across social media. Then you look across the many different blogs, and you’ll be created with a circle profile for the operator’s “about me.” You’ll see circle profiles on resumes, slide decks, policy briefs, and more.
Point being, circles are in, and you need to get on board, and that’s probably a big reason why you’re here reading this very post!
The problem is, what shape are most of our photos? Square or rectangle, right? Well, while you can’t fit a square peg into a round hole, you can most certainly make your square photo into a circle, and it’s really pretty easy.
So, I’ll go through and show you just how easy it is to create a circle profile picture for your many uses. You can think of it as photo cropping or just simply fitting your photo into a circle backdrop.
So, not this; it’s way cooler.

1. Find/Upload Your Photo
The very first step is making sure your square or rectangle photo is in Canva, ready for use. So, if it’s a photo your’e uploading yourself, you’re going to want to go ahead and do so.

2. Add a Photo Frame
Next, find your frame, which is basically the circle in which you’re going to want to add your photo.
If a circle, you have a few options in Canva, from the traditional shape, to a circle with a border, and even circle-ish frames that are fun and can be useful depending on your needs.

3. Place Photo Into Frame
Yes, it’s that simple. With your desired photo and photo frame ready to go, all you have to do is drag the photo into the frame. Upon doing so, you’ll notice the photo go transparent to signal the activity, and once you let go of your click, voila.

And again—it doesn’t have to be your traditional circle…there are plenty of cropping options.

Extras
Now, this might be good enough for many of you, but some of you might need or want to take a few additional steps.
RELATED: How to Use Elements from a Previous Canva Design.
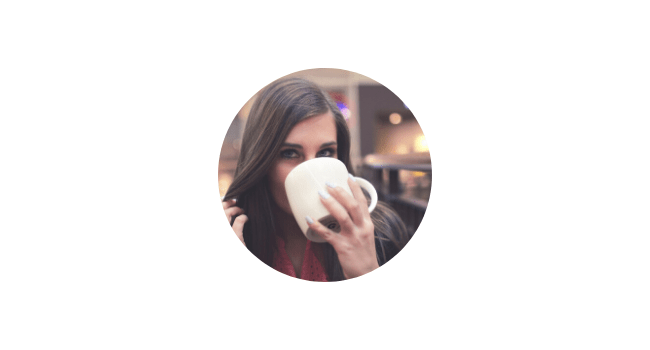
The first is “shifting” the photo so the main or desired part of your square photo is the piece that is being featured front and center in the circle frame.
For instance, with the example below, the default placement has the woman to the left of the frame, with a lot of unnecessary background showing on the right.
So, to center the woman, you simple need to double click the photo, which will bring up your cropping capabilities. From there, simply grab and drag the photo to be placed where you’d like.
Then, how about a transparent background? Yes, in the unfortunate event that you take an amazing profile picture, only to be thwarted by the shopping mall setting behind you, you can just remove the background!
Now, this does require a Canva Pro membership, which is actually free for 30 days. But, once you’ve upgraded, all it takes is one click! Simply go to “effects” and click “background remover.” (Read more about how to remove the background in Canva.)
![]()
From there, as shown above, you can place the image in your circle frame, and then add a background color if you wish!
Questions? Comments? Here is a video tutorial that captures it all.


